Problem: Blurry, tiny, or unclear artwork leads to filled-in letters, rough edges, and a proof that needs rework.
Solution: Send the clearest file you have at real size, on a clean background, with size, fabric, placement, and format written out.
Next step: Use the check-list in this guide on your next order — it takes two minutes and prevents most first-proof fixes.
Why prep decides the result
A digitizer rebuilds your artwork as stitches. Every line in the file you send becomes a choice: satin or fill, this direction or that one, keep this detail or drop it. If the artwork is clear, those choices are easy and right. If the artwork is a blurry screenshot, the digitizer has to guess where edges sit and what small shapes were meant to be — and a guess that is off by a hair on screen can be off by a visible step in thread. Thread has real width. It cannot draw the hair-thin lines a screen can. Good prep is how you make sure the design in thread matches the design in your head.
The good news is that good prep is not hard, and it does not need special software. It needs the right file, at the right size, with the right five details written beside it. This guide walks through each one, in the order a digitizer looks at them.
Step 1: Send the best file type you have
Vector files sit at the top of the list: AI, EPS, SVG, CDR, or a PDF that holds true vector shapes. A vector file describes art as points and curves, so it stays sharp at any size and its edges are exact. If your logo came from a designer, ask for the vector version — it often exists even if you were only handed a JPG for daily use. If the design will also go on print or a website later, consider a proper vector art conversion once, and reuse it everywhere.
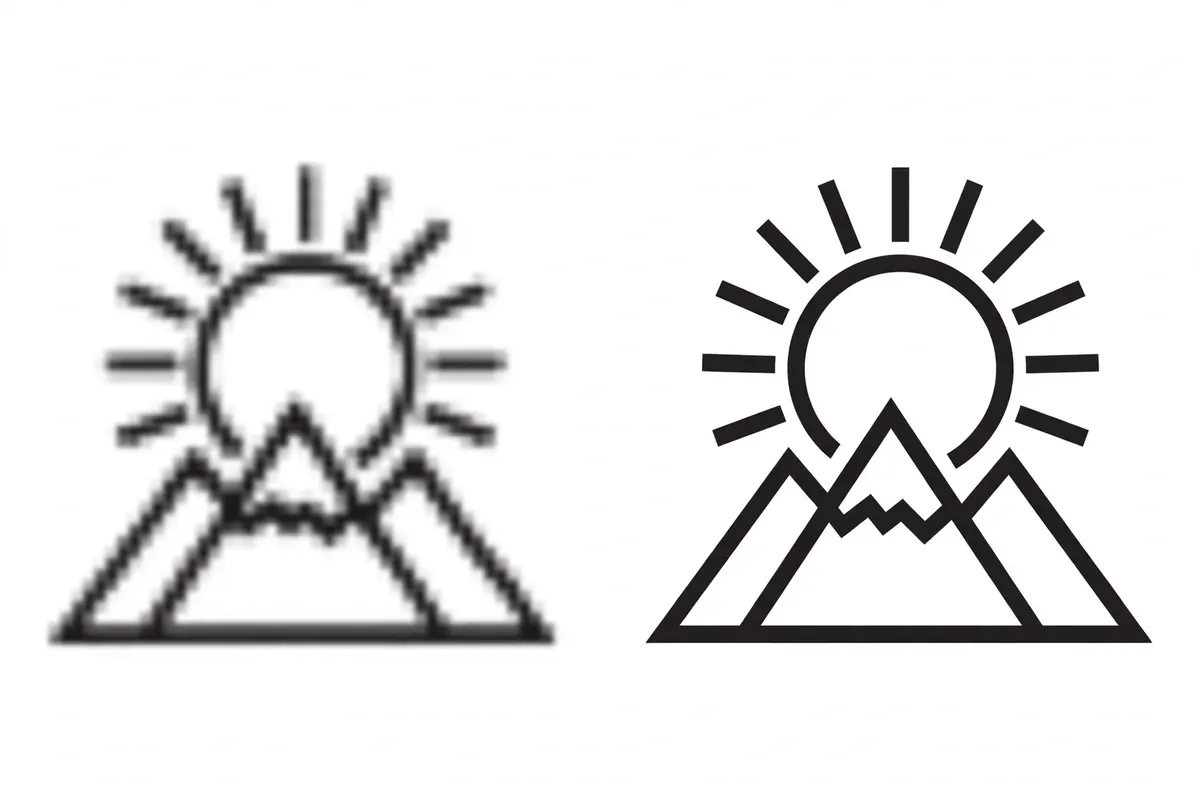
No vector? Send the clearest raster file you have: PNG first, then JPG, then a flat PDF. Send the original file, not a copy of a copy. What hurts most is the screenshot: a screen grab of your art inside another app, a photo of a monitor, or an image pulled from a chat thread after it was compressed twice. Each of those steps softens edges and adds stray colors. If all you have is a photo — of a printed shirt, say — take it straight on, in good light, filling the frame, and tell us it is a photo. We can work from it, but we would rather know.
Step 2: Get size and resolution right
Two sizes matter, and people mix them up. The file size is how big the image is on your screen or in pixels. The finished size is how wide or tall the design will sew, in inches, on the garment. Always tell us the finished size. “About cap size” forces a guess; “3.5 inches wide on a cap front” gives an exact plan, and the plan for 3.5 inches is honestly different from the plan for 5.
For resolution, a clear file at about 300 DPI at the finished size is a solid target for raster art. Larger is fine. The rule that matters is simpler: zoom in on your file until it matches the real sewing size on your screen. If the edges still look clean and the smallest letters are readable, the file is good enough. If it falls apart into blocks at real size, it will digitize rough, and a better source file is worth hunting for before you pay for any work.
Step 3: Clean up the background and colors
A design on a plain white background, or with the background removed, is the easiest to read. Busy backgrounds — a photo of a room behind a logo, a gradient that is not part of the design — force the digitizer to decide what counts as art. If you cannot remove the background, say in your message what belongs and what does not. One line does it: “Only the bird and the words are the design; the sky behind is not.”
Colors need the same clarity. If your brand colors must match a thread chart, name them or send the chart codes. If close is fine, say that too, and the studio will pick standard thread matches. Watch out for near-duplicate colors in low-quality files: a JPG can turn one navy into five muddy shades, and the digitizer needs to know it is one color, not five. Fewer, clearer colors also mean fewer stops at the machine — which your production run will thank you for.
Step 4: Face the small-detail problem early
Thread cannot do everything ink can. Letters under roughly a quarter inch tall tend to fill in. Lines thinner than a satin stitch can hold will break up. Tiny gaps between shapes close when stitches pull. None of this is a digitizer failing; it is the material setting its limits. Good prep means facing those limits before money changes hands. Look at your design at the true finished size and ask: can I read every word? Does every shape still make sense? If a detail fails that test on screen, it will fail harder in thread.
You have three honest options for problem details. Make the design bigger, if the placement allows it. Simplify the detail — fewer, bolder shapes sew better than many fine ones. Or move the detail: tiny text that fails on a chest logo often works fine as a larger sleeve or back print-style embroidery. A good studio will flag these spots in your quote rather than quietly stitching a blob. If a quote comes back with no comment on a design full of tiny text, be suspicious.
Step 5: Write the five details beside the file
The artwork shows what the design looks like. It cannot show where it will live, and that context changes the file. Send these five short details with every order: finished size in inches; garment or fabric; placement; machine format; and deadline. Add thread colors if they are fixed, and name the final version if you send more than one file. For fashion work, add the garment details that matter: neckline depth, border length, how a motif set should repeat, and the fabric's weight and stretch.
Then do one last check before you send: is this the final art? Digitizing a draft and redoing the final version doubles your cost for no reason. Lock the art, lock the size, and then order. If changes are likely — a sponsor name still pending, say — tell the studio, and the design can be planned so that part is easy to swap later.
A two-minute check-list to reuse
- Best available file: vector if you have it, clearest PNG or JPG if not
- Finished size written in inches — not “small” or “large”
- Plain background, or a note saying what is not part of the design
- Smallest text checked at real size and still readable
- Size, fabric, placement, format, and deadline in the same message
- Final version confirmed — no drafts
Follow that list and your first proof will usually need no fixes at all. Skip it, and the most skilled hand in the studio is still working from guesses. Prep is the cheapest quality you can buy, because most of it is free — it is just care, taken two minutes early.
Related services
Frequently asked questions
What is the best file type to send?
A vector file — AI, EPS, SVG, CDR, or a vector PDF — is best, because its shapes stay sharp at any size. If you do not have one, send the clearest PNG, JPG, or PDF you have. Avoid screenshots of your art on a screen and photos taken at an angle, because both bend straight lines and blur small detail the digitizer needs to see.
How big should my artwork file be?
Send the artwork at, or larger than, the finished sewing size, and tell us that finished size in inches. For image files, a clear file around 300 DPI at the real size is a good target. Bigger and clear beats small and sharp-looking: a digitizer can scale clean art down, but cannot invent detail that a tiny, blurry file never had.
Should I remove the background first?
It helps, but it is not required. A plain white or transparent background makes edges easy to read and avoids mix-ups about what is part of the design. If your art sits on a photo or a busy background, tell us which parts belong to the design. Never leave us to guess — a wrong guess gets stitched, and unpicking costs more than a one-line note.
What details should I include with my order?
Include the finished size, the garment or fabric, the placement, your machine format, your thread colors if they matter, and your deadline. Add anything the art cannot show: which version is final, text that must stay exact, or a part you want left out. Five short lines with your file can save a full round of questions and a day of waiting.
Artwork ready? Send it the right way
Attach your clearest file on WhatsApp with size, fabric, placement, and format. You get a free quote and a proof planned from clean art.
Send Artwork on WhatsApp